One great tool in customizing a form is using Sharepoint Designer 2007. It does not require heavy coding unlike Visual Studio.
I will show you how to customize a form using Sharepoint Designer 2007. From this point I’ll call Sharepoint Designer as SPD.
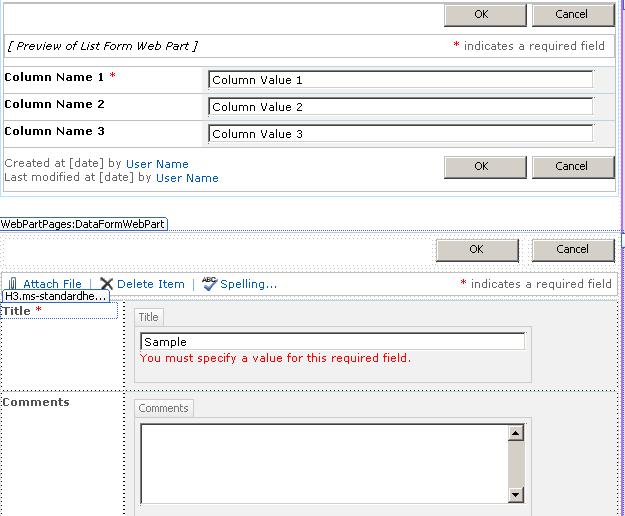
Below is the form in Sharepoint Site.

Open your SPD, click File -> Open Site. After opening your site, you can see at the left panel the Folder List tab.

In the example, I will customize the EditForm.aspx. It is the page that can be seen when you edit an item. Double click it to open. As you can see, the columns don’t appear and because of that you cannot customize it.


What will you do is click the PlaceHolderMain to highlight it, then press right arrow key and press enter to put the cursor below it. This will where you will insert something.


A menu will appear, choose the list in the dropdown, in the example Mek List. Content type in the dropdown is Item. In the Type of form to create choose Edit item form, in this example I want to customize EditForm.aspx. Then press OK.

Now the customize form and fields will appear below the default form. You can now customize the fields, etc.
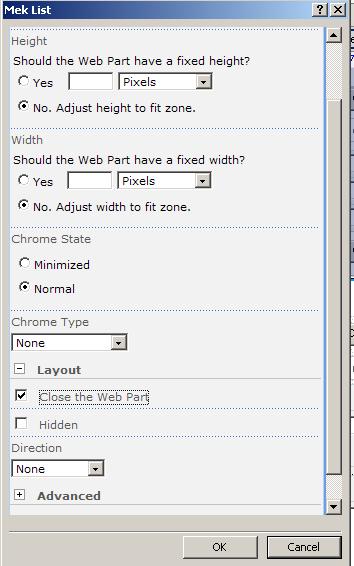
The final step is to close the default form, remember DO NOT DELETE IT. Just close it. Right click on it and choose Web Part Properties. A menu will pop, nnder Layout check Close Web Part.